在Python安装了了matplotlib, plotly都可以比较方便绘制静态的图片,静态图片以特殊的字符串,保存在ipynb文件里面,而绘制动态图片需要安装插件。bokeh, pyecharts本身就是利用Javascript技术绘制动态的图片,而在JupyterLab里要加载使用的JS,也需要安装插件,或用一些方式来加载。
1.Matplotlib插件——ipympl
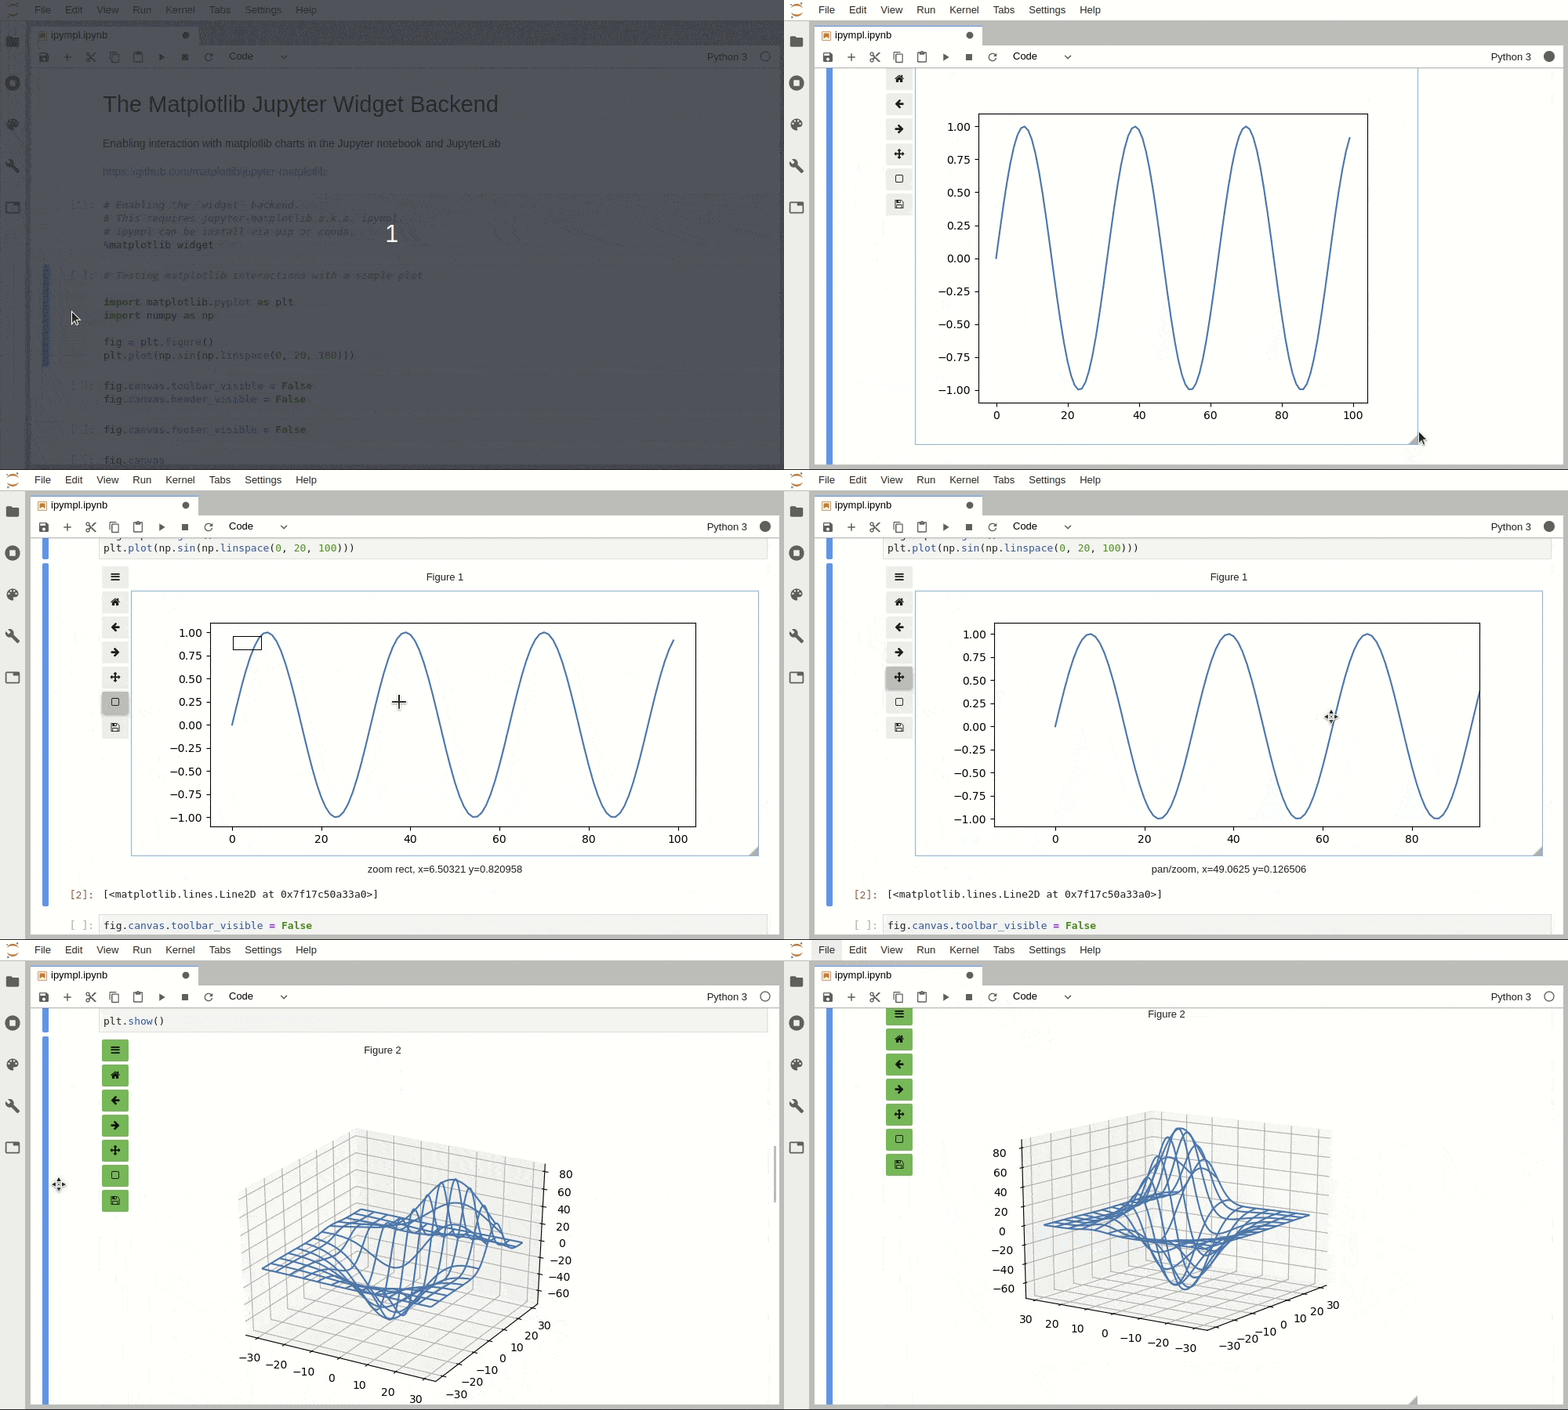
安装ipympl的方法如下:
# 用conda安装,pip安装同理,注意加上版本号
conda install -c conda-forge ipympl
# 安装依赖包
conda install -c conda-forge node.js
# 安装依赖插件,以显示动态绘制区域
jupyter labextension install @jupyter-widgets/jupyterlab-manager
# 安装ipympl插件部分,注意版本号
jupyter labextension install jupyter-matplotlib@0.7.0
这里要注意包与插件不同版本之间的兼容性问题,JupyterLab很多插件都要注意版本号之间的兼容问题。
| ipympl | jupyter-matplotlib | JupyterLab | Matplotlib |
|---|---|---|---|
| 0.5.8 | 0.7.4 | 1 or 2 | 3.3.1 |
| 0.5.7 | 0.7.3 | 1 or 2 | 3.2.* |
| ... | ... | ... | |
| 0.5.3 | 0.7.2 | 1 or 2 | |
| 0.5.2 | 0.7.1 | 1 | |
| 0.5.1 | 0.7.0 | 1 | |
| 0.5.0 | 0.6.0 | 1 | |
| 0.4.0 | 0.5.0 | 1 | |
| 0.3.3 | 0.4.2 | 1 | |
| 0.3.2 | 0.4.1 | 1 | |
| 0.3.1 | 0.4.0 | 0 or 1 |
seaborn是基于matplotlib封装的绘图包,目前没有发现有动态绘图插件。
2. Plotly插件
plotly能更好地绘制3D图,科学类图表。在JupyterLab绘制也是用了Javascript技术。安装方法如下:
# 安装4.11以上的包也可以
conda install -c plotly plotly=4.11.0
# 其它依赖包也有版本要求
conda install jupyterlab "ipywidgets=7.5"
# JupyterLab绘图插件
jupyter labextension install jupyterlab-plotly@4.11.0
# JupyterLab动态绘图插件,最好与前者的版本一致
jupyter labextension install plotlywidget@4.11.0
# 在安装ipympl安装了,可不重复安装下面这个插件
jupyter labextension install @jupyter-widgets/jupyterlab-manager
3. Bokeh插件——jupyter_bokeh
Bokeh的绘图逻辑与matplotlib的很不一样,就像一部分一部分手动绘图那样,定制化程度高,当然写的代码量也多。
以下是安装方法:
# 安装绘图包
conda install -c bokeh jupyter_bokeh
# 安装动态插件,之前安装了可以不再安装
jupyter labextension install @jupyter-widgets/jupyterlab-manager
# 安装jupyter_bokeh插件,注意版本号
jupyter labextension install @bokeh/jupyter_bokeh@2.0.0
Jupyter_bokeh插件版本兼容性如以下表格:
| JupyterLab | jupyter_bokeh |
|---|---|
| 0.34.x | 0.6.2 |
| 0.35.x | 0.6.3 |
| 1.0.x | 1.0.0 |
| 2.0.x | 2.0.0 |
4.Pyecharts渲染动态图的方法
因为目前还有没pyecharts的JupyterLab插件,如果直接使用.render_notebook()本渲染是看不到动态图。所以以加载它的JS文件。
具体方法如下:
# 用CurrentConfig来声明运行的环境,然后加载官网线上的依赖文件
from pyecharts.globals import CurrentConfig, NotebookType
CurrentConfig.NOTEBOOK_TYPE = NotebookType.JUPYTER_LAB
CurrentConfig.ONLINE_HOST
# 按自己方式引入图类,绘图
bar = Bar()
bar.add_xaxis(...)
bar.add_yaxis(...)
# 加载JS,绘图,这两句要与上面的写在两个不同的单元格
bar.load_javascript()
bar.render_notebook()
按照上述操作后,偶尔还是会无法显示,那就重启一下JupyterLab就好了。
这样,基本就可以在JupyterLab上绘制各种想要的动态图、3D图了。









评论